Workgroup network replaced with Homegroup in Windows 10, Homegroup used to connect 2 or more PCs to have files and printers, not only share folder and printer, you can share any information between desktops, we had multiple issues after upgrading from Windows 7, 8 and 8.1 to WIndows 10, unable to retrieve the old homegroup password, we can’t see the Join button on the other PC, windows 10 homegroup not working, will explain in details how to resolve all these issues and how to setup Homegroup in Windows 10
Also Read: How to Fix High RAM/CPU Memory Usage on Windows 10
Below procedure will resolve all basic Homegroup issues on Windows 10
- Shutdown all the computers in your Homegroup
- Power-on one system first
- Go to Network/Sharing Center
- And create a Homegroup
- It will give you a password (you can change the password later)
- Power-on other systems one by one
- Add to created Homegroup
- This will resolve major Homegroup issues
How to Change Homegroup password
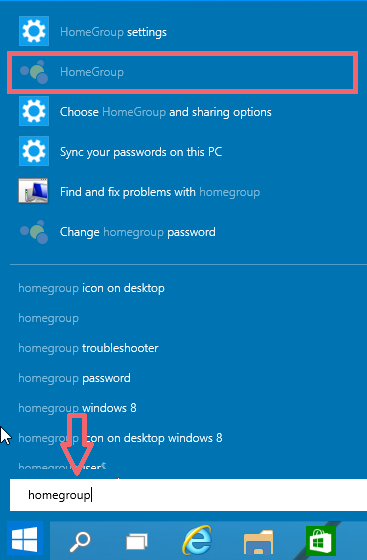
- Windows Key + S (This will open Search)
- Enter homegroup, then click homegroup Settings
- In the list, click Change homegroup password.
- Click Change the password, and then follow the instructions to change the current password
How to Creating a homegroup
- Windows Key + S (This will open Search)
- Enter homegroup, then click homegroup
- Follow the instructions to create a new homegroup
- And select what needs to be shared
- Enter password
- Click Finish
Also Read: Windows 10 Permission issue with Domain Admin
Add PCs to the existing homegroup
- Windows Key + I (This will open Windows 10 settings)
- Select Change PC settings
- Click Network, and then clicking HomeGroup
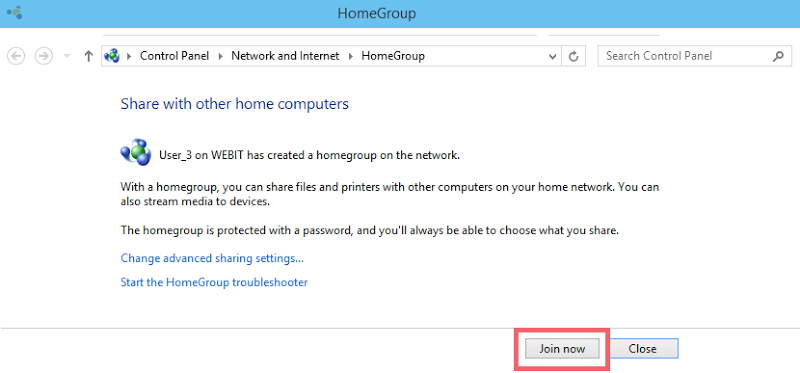
- Enter the homegroup password, then click Join
- Select the libraries and devices that you want to share with the homegroup.
- Click the control under Media devices if you want to allow devices on the network, like TVs and game consoles, to play the shared content
Also Read: Windows 10 Keyboard Shortcuts Tricks and Tips
Open shared files from homegroup
- Windows Key + S (This will open Search)
- Enter File Explorer in the search box
- Clicking File Explorer
- Select Computer under HomeGroup
- In the file list, double-click the library or double-click the file or folder you want to open
Other Windows 10 related post from Windows Tricks


Good article…except that the instruction to go to Internet and Sharing is incorrect.
Go to HomeGroup, which is a distinct and separate Control Panel subgroup. That’s where you create, join, change passwords etc for a HomeGroup.
Good, except that you don’t go to Internet and Sharing.
“HomeGroup” has its own Control Panel subgroup.
These simple steps (shutting down all computers and starting one at a time) solved my HomeGroup frustrations! I was stuck in a situation where all computers said a HomeGroup existed, though none were actually joined. I think this was a result of the 7->10 upgrade process.
Thanks for sharing this!
Solution 1 – Delete files from PeerNetworking folder
Go to c:\windows\serviceProfiles\LocalService\AppData\Roaming\PeerNetworking.
Delete idstore.sst and move on to Step 3. If deleting idstore.sst doesn’t work, go back to c:\windows\serviceProfiles\LocalService\AppData\Roaming\PeerNetworking and delete all files and folders in it (for this you have to switch off temporarilySERVICES > PEER NETWORK GROUP service) and go back to Step 3.
Go to the Network Settings and Leave the Homegroup.
Repeat this for all the computers in your network.
Turn off your computers.
Turn on just one, and create a new Homegroup on it.
This Homegroup should be recognized on all of your computers now.
Solution 2 – Enable Peer network grouping services
Sometimes it can happen that services needed for Homegroup to work are disabled for some reason, but there’s a way to enable them.
In the Search bar type services.msc and search the list for peer network grouping, peer network identity manager, homegroup listener and homegroup provider.HomeGroup Listener Service
WE RECOMMEND: Click to free scan your PC for malware & improve performance
If those services are disabled or set to manual set them to auto and leave your Homegroup.
Create new Homegroup and see if it works.
We have to mention that you might have to do this for all the computers in your network.
Thank you very much for this.
You are the only help site (including Windows 10 Help itself) who said to start by shutting down all the computers and firing them up one by one. The complete opposite of what one might expect when setting up a network.
Briiliant advice
Excellent post, great quality and most important all above mentioned point very useful actionable advice with easy steps!
Thank you soooo much for posting the resolution to my Windows 10 Home Group frustrations!